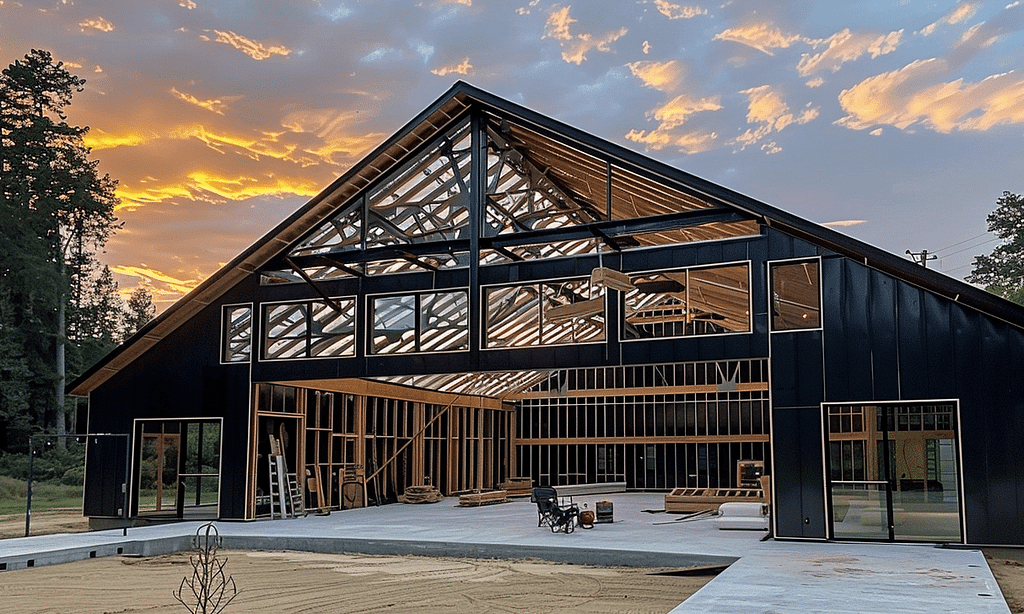
Building a barndominium is like crafting a personal sanctuary that blends the rustic charm of a barn with modern livability. But before you can adorn your new home with barndominium design ideas and choose between an expansive porch or a sleek metal façade, you need a solid foundation. If you’re eager to lay the groundwork for your dream abode, this step-by-step foundation construction techniques guide is here to help.
Planning and Preparation
Preparing the foundation for your barndominium is not just a formality—it’s the backbone of your entire structure. Imagine trying to build a castle atop a shaky hill. Spoiler alert: It doesn’t end well. That’s why it’s crucial to start with meticulous planning.
Pick the Perfect Spot
Selecting the right site for your barndominium foundation involves more than just pointing to a place and saying, “There’s good.” Consider soil type, drainage patterns, and orientation, which will influence your structure’s longevity and energy efficiency. These decisions form the critical first steps of our barndominium foundation guide.
Survey the Land
A land survey will not only confirm boundaries but also help you avoid costly hiccups like utilities or uneven terrain. Think of it as a treasure map that shows all the hidden details of your plot. Engaging a professional surveyor might seem like an overhead, but it’s akin to tightening your climbing harnesses before scaling a mountain.
Site Preparation
Once you’ve locked down the perfect piece of land, it’s time to prepare it for construction. This phase involves clearing the site of any debris, rocks, or trees that may interfere with the foundation.
Grading and Leveling
Achieving a level surface ensures that your foundation has a uniform thickness, vital for structural integrity. Grading promotes proper drainage, preventing water from pooling around your sanctuary. No one wants a barndominium that’s more pool than farm!
Selecting the Right Foundation Type
Barndominiums generally use three types of foundations: slab, pier and beam, or crawlspace. Your choice will depend on the area’s climate, soil conditions, and your budget.
– **Concrete Slabs** are a popular choice for their simplicity and cost-effectiveness. They offer a stable base, especially in regions with stable, non-expansive soils.
– **Pier and Beam Foundations** provide better insulation and access to plumbing but may be more vulnerable in flood-prone areas.
– **Crawlspaces** offer easy access to wiring and plumbing but can harbor moisture unless adequately ventilated.

Poured Concrete and Reinforcement
Once the site is prepped, it’s time for the muscle of the operation: laying the concrete and reinforcing it. Imagine the rebar as the skeleton in a human body; it gives everything else something to cling to.
Setting the Forms
Forms hold the concrete in place until it cures. This part of the process is not just carpentry—it’s an art. Properly set forms ensure your foundation stays true to shape.
Installing Reinforcement
Rebar and wire mesh add tensile strength to your foundation, making it less prone to cracking. Precision here is crucial to distributing weight evenly across your foundation. Skimping on reinforcement is no different than using cheap thread on a parachute.
Pouring and Curing
Pouring the concrete is only half the story; how it cures determines its final strength. The curing process allows the concrete to develop its maximum load-bearing potential, much like letting bread dough rise.
The Pour
Pour the concrete in one continuous session to avoid creating cold joints, which could compromise the integrated strength of your foundation. Use a screed to level the concrete, ensuring a smooth finish.
Curing Time
The curing process involves keeping the concrete moist, either by using curing compounds or covering it with wet burlap. Concrete may appear ready after 48 hours, but its true strength manifests over several weeks. Patience is crucial—cutting corners here can lead to disastrous shifts in your barndominium foundation.

Final Touches and Preparation for Framework
Before you can dive into DIY electrical wiring or adding insulation best practices, make sure everything’s in tip-top shape with these finishing touches.
Waterproofing
Sealants and waterproof membranes help guard your foundation against moisture, which is particularly crucial if you’ve chosen a crawlspace. These barriers act like a raincoat for your foundation, preventing dampness from creeping through.
Backfilling
With waterproofing in place, fill in the excavated area around your foundation. Use compactable materials like gravel or stone to ensure the earth stays firm against your structure. A well-backfilled foundation is akin to rooting a plant in nutrient-rich soil—it sets the stage for healthy, robust growth.
Prepare for Future Connections
Leave provisions for utilities before your foundation becomes a bustling construction site. It’s easier to plan these details now, rather than retrofitting your plumbing or electrical systems later on. With the groundwork laid, you can dedicate your energy to embellishing your space with ingenious barndominium design ideas!

Conclusion
Laying the foundation of your barndominium is a meticulous endeavor, but the rewards are enduring. You wouldn’t build a skyscraper on flimsy stilts; your barndominium deserves the same thoughtful construction. By following this step-by-step barndominium foundation guide, you’ve set your home—and your dreams—on a solid path to success. Armed with these techniques and insights, you’re ready to transform your


